Everything is plug and play on Themis/BIOS but it is smart to share some basic knowledge as far as recording the temperature of a fluid is concerned.
using modbus devices
A convenient solution is to use a modbus module, such as Promux PM6RTD
In a nutshell, keep the factory settings on the PM6RTD : 9600 bauds, 1 stop bit, no parity.
| PM6RTD RS485 terminal block | 4 | 3 | 2 | 1 |
|---|---|---|---|---|
| connector | 4- | 3+ | 12V+ | GND |
Adjust the modbus address with the switches on the front
| modbus address | S1 | S2 | S3 |
|---|---|---|---|
| 1 | ON | OFF | OFF |
| 2 | OFF | ON | OFF |
| 3 | ON | ON | OFF |
RTU mode
Use a USB to serial adapter :
- a very cheap dongle can be found on reichelt - no driver required on linux, plug and play
- moxa uport 1150 - drivers are required but everything is included in the latest BIOS image.
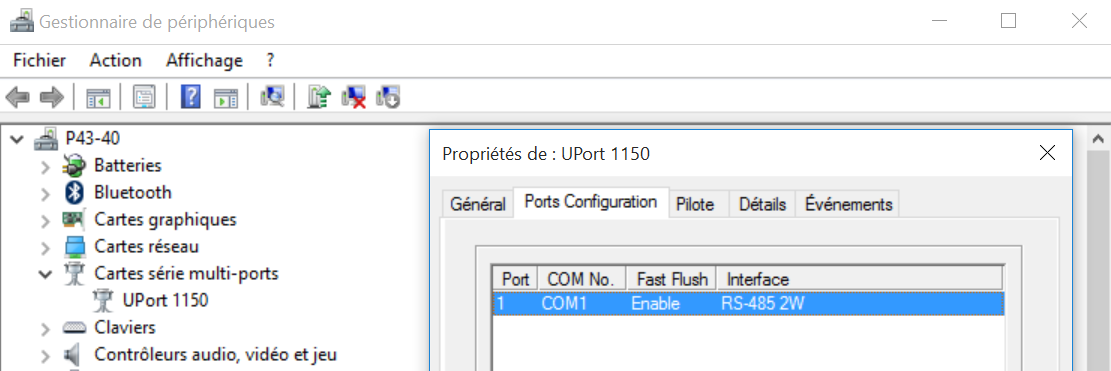
If making tests using a window desktop, go to the device manager and fit the Moxa so it works in RS485(2W). Here the Moxa appears to be on COM1
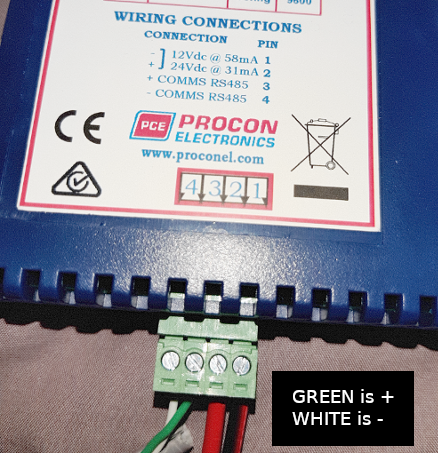
| promux | 4- | 3+ |
|---|---|---|
| cable | white | green |
| uport 1150 | R-(D-)=4 | R+(D+)=3 |
TCP mode
The use of a TCP mode may be necessary to exchange with other PLCs.
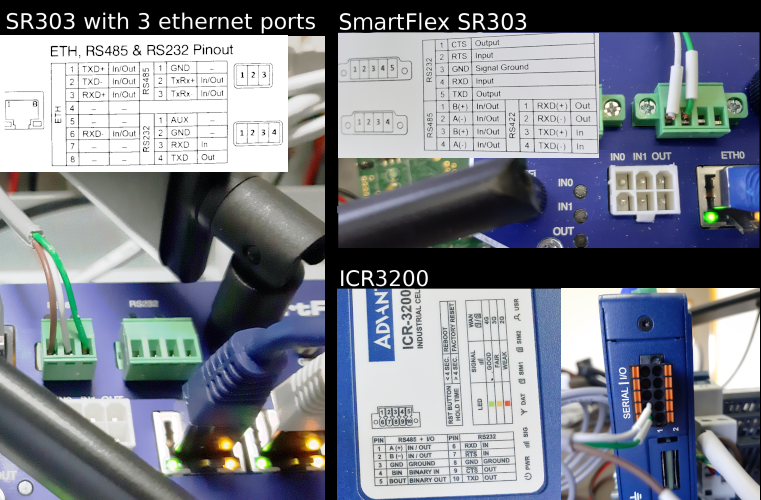
To do this, BIOS can act as a TCP server for a RTU bus connected via USB (serial forwarding mode) BUT you can also use the RS485 port of the smartflex or ICR Advantech router.
basic testing and discover how to configure
Once the promux module powered and connected via RTU or TCP, make a simple test with modbus doctor. Even without any sensor, you can check the serial on register 0. It should be something like 96D (upper byte = software version, here 9, lower byte always = 109 ie 6D)
The PM6RTD supports various RTD types :
| number | RTD Type |
|---|---|
| 1 | PT100 |
| 2 | Ni120 |
| 3 | PT1000 |
| 4 | Ni1000 DIN |
| 5 | Ni1000 Landys&Gyr |
| 6 | Ohms 10 - 400 ohms |
| 7 | Ohms 100-4000ohms |
| register number | description |
|---|---|
| 30001 + 99 | modbus address or unitId |
| 40001 + 100 | RTD Type |
| 40001 + 101 | Line Frequency (50/60) |
| 40001 + 102 | Units Type (1=°C, 2=°F) |
register 99 is read only : it’s an input register with an offset equal to 30001
registers 100, 101 and 102 are read and write : they are called holding registers, with an offset of 40001
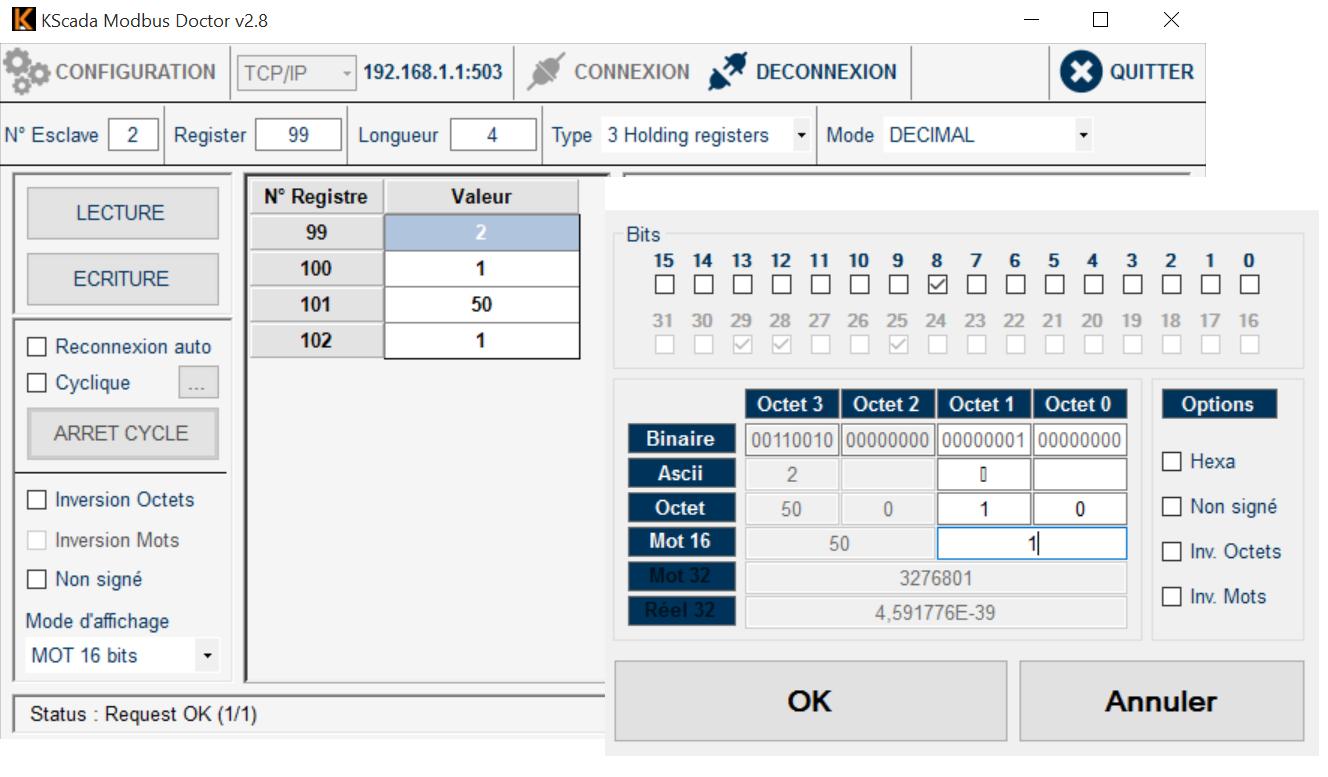
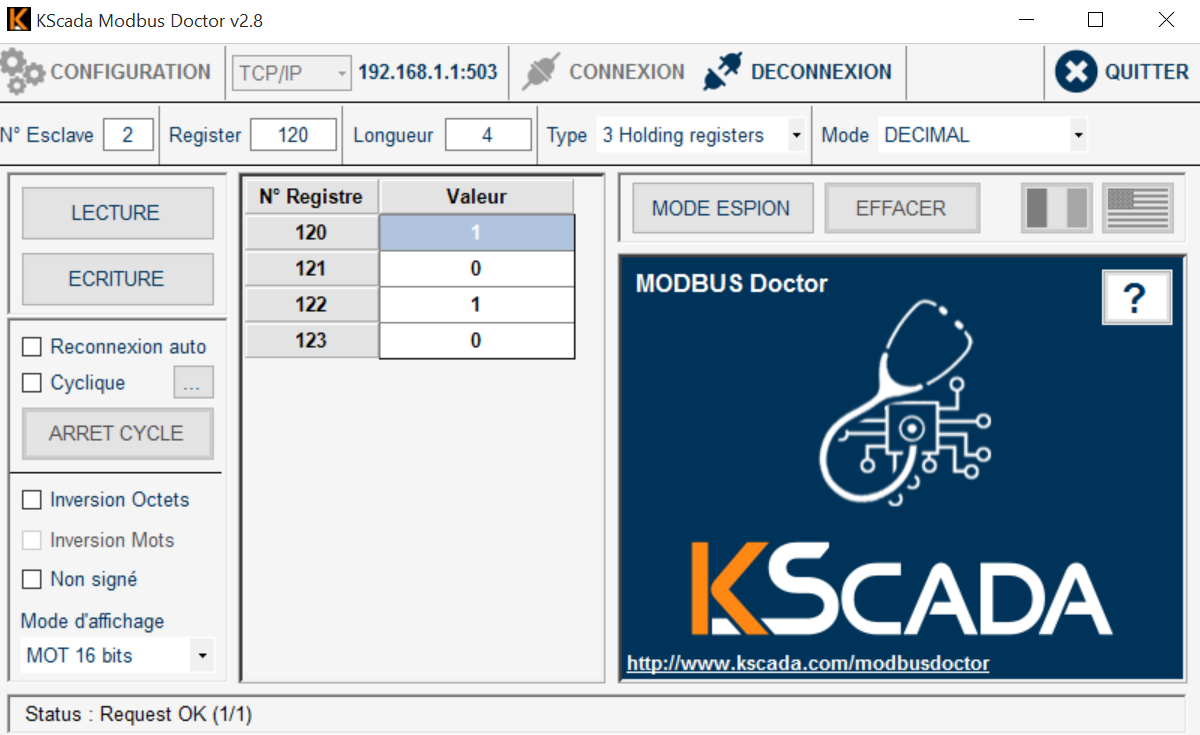
Here is a screen capture for a PM6RTD configured with modbus address 2, PT100 and °C
if DIP 10 is OFF, communication settings are 9600 bauds, no parity, 1 stop bit
if DIP 10 is ON, communication settings can be programmed :
| register number | description |
|---|---|
| 40001 + 120 | Baud Rate (2400, 4800, 9600, 19200, 38400,57600,115200) |
| 40001 + 121 | Parity (0 = none, 1 = even, 2 = odd) |
| 40001 + 122 | Stop Bits (1 = 1 stop bit, 2 = 2 stop bits) |
| 40001 + 123 | Reply Delay (0 = Disable, >0 = Enable) |
PT100 wiring
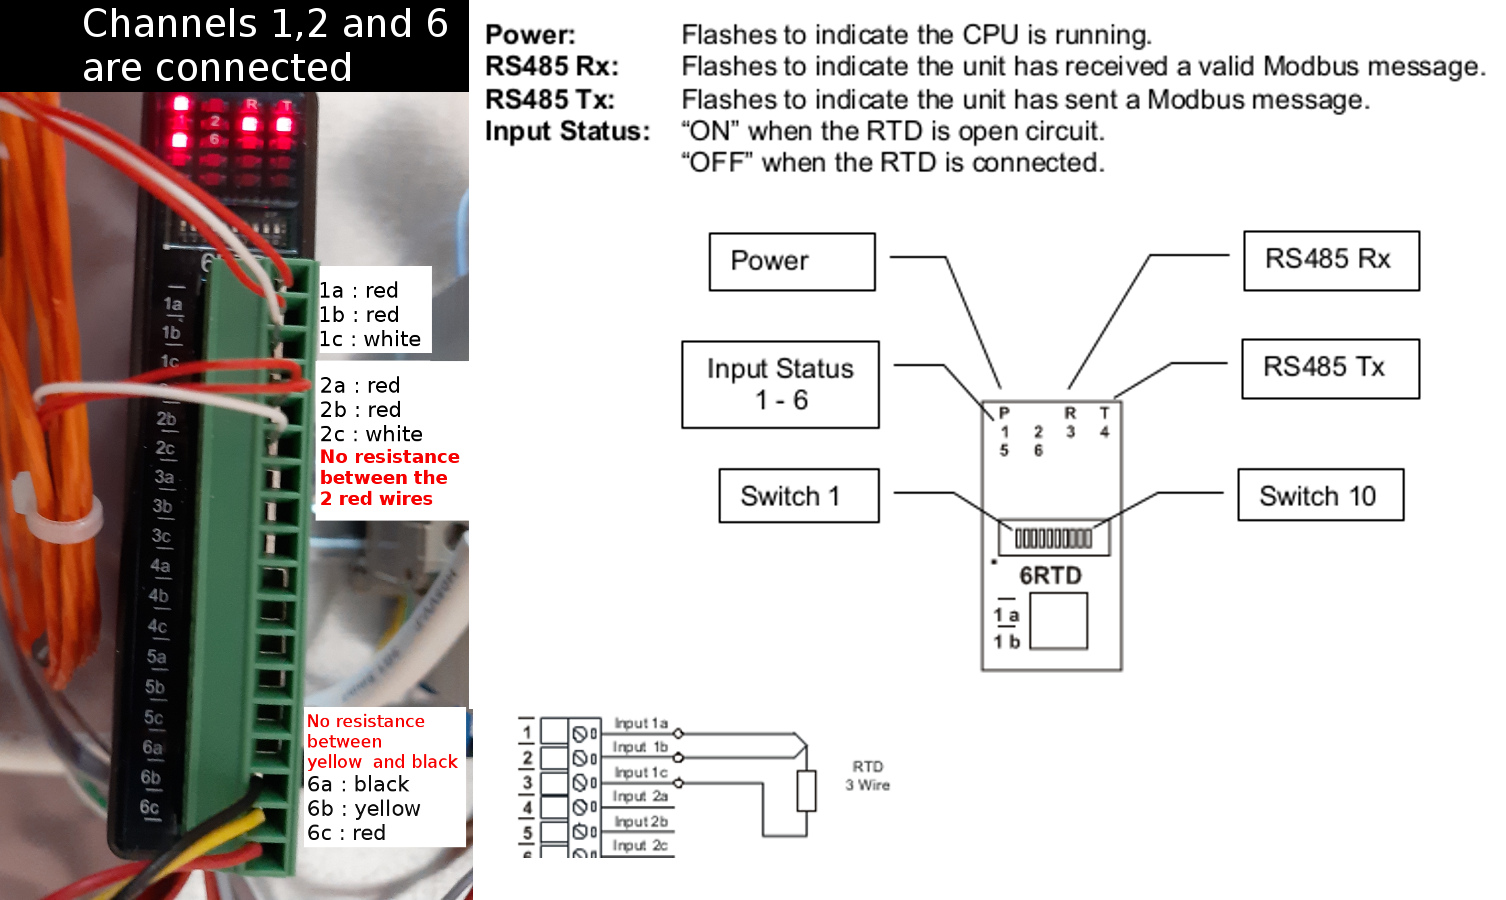
**with the PM6RTD, sensors values can be found from register 1 to 6 (30002 to 30007) **
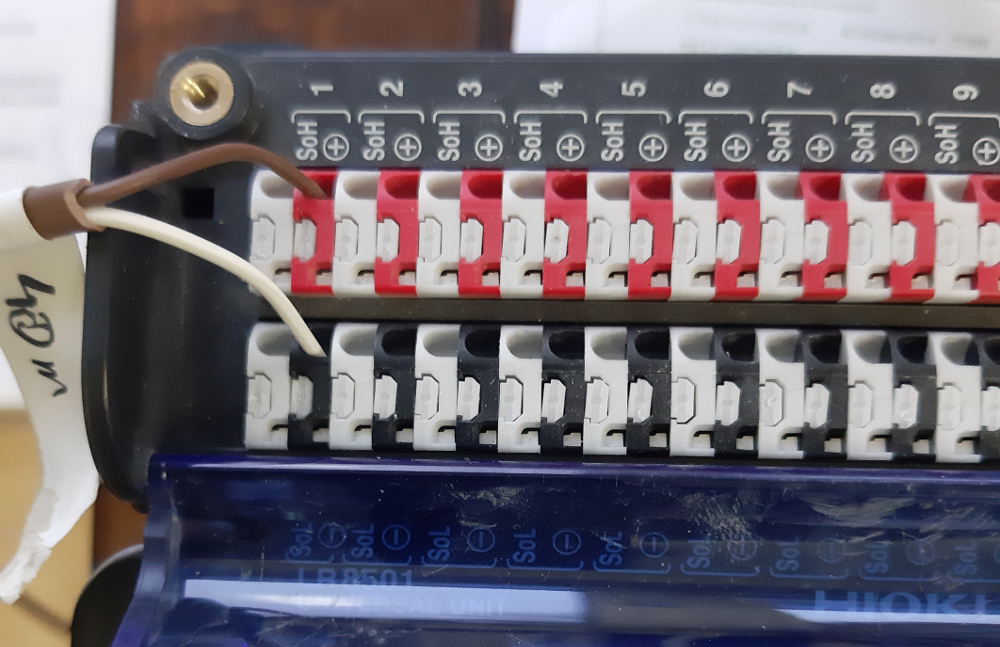
thermocouple wiring
Composition : copper / Constantan (copper + nickel)
From −185 °C to 300 °C ;
accuracy +/-0,1 °C from −200 °C to 200 °C.
CEI 584-3
- brown rubber sheath
- brown = +
- white = -
Use the PM8TC isolated module
**with the PM8TC, sensors values can be found from register 1 to 8 (30002 to 30009) **
using a TCP datalogger
in case of a demonstrator instrumentation, with a lot of data to record, the HIOKI 8402-20 is a good choice
Using the HIOKI 8402-20 datalogger with a universal analog input unit LR8501
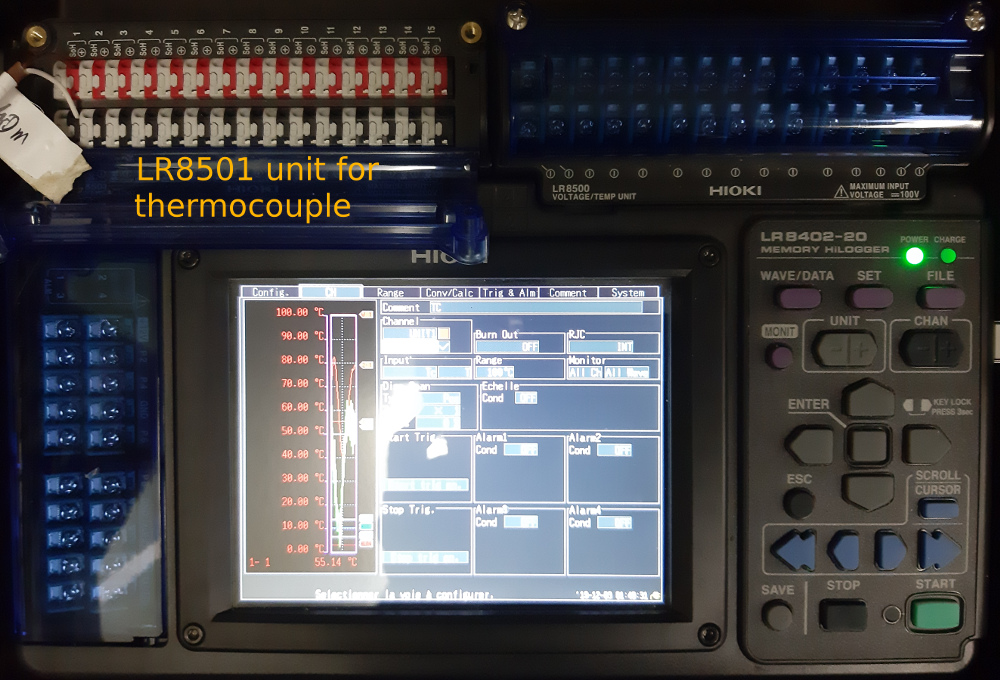
Configure the HIOKI 8204 for DHCP and connect it to the smartflex via an ethernet cable
Define a static DHCP lease for the HIOKI, using its MAC address :
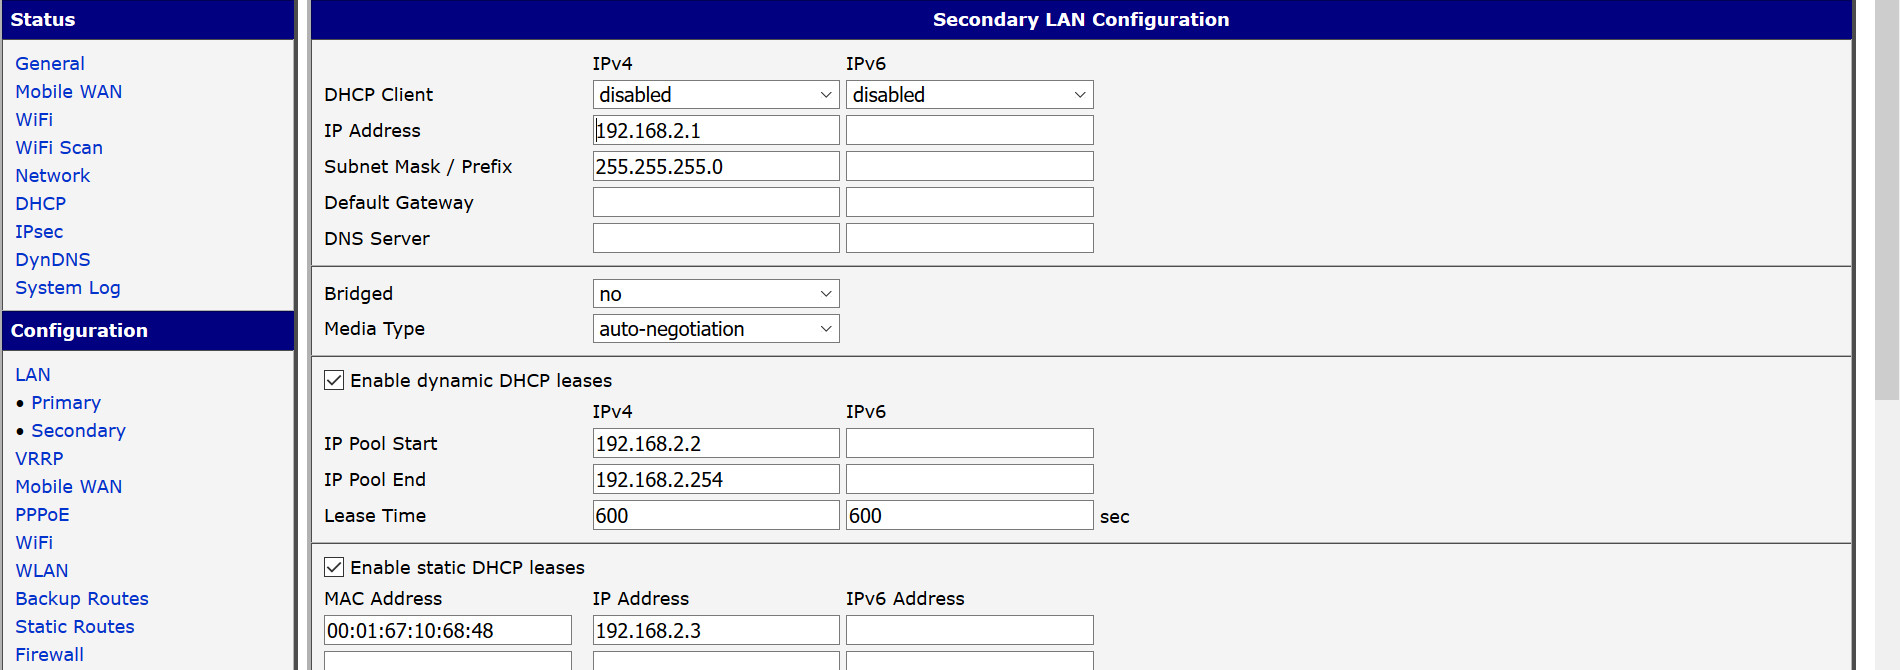
use the specific Hioki socket interfacer for emonhub :
[[HiokiTCP]]
    Type = EmonHiokiTcpInterfacer
    [[[init_settings]]]
	    IP = 192.168.2.3
	    port = 8802
    [[[runtimesettings]]]
           pubchannels = ToEmonCMS,
           nodeId = 1
           # in seconds
           interval = 10
node configuration
[[1]]
    nodename = Hioki8402
    [[[rx]]]
       names = TC1,TC2,TC3
       channels = 1,1,1
       voice = 1,2,3
There is no datacode to fix : the HIOKI is streaming ASCII and the decoding is integrated to the interfacer
to understand how to interrogate the HIOKI opening a TCP socket : python building block